|
|
楼主 |
发表于 2009-11-13 15:30:32
|
显示全部楼层
又来了!
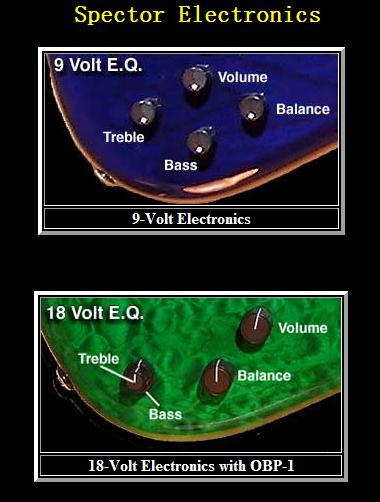
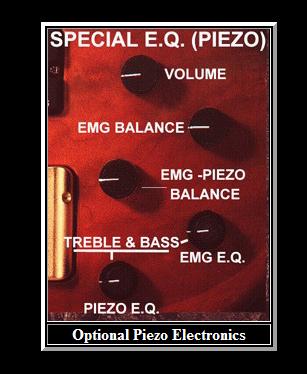
上几张电路的控制部分图片和一篇SPECTOR SET UP的文章,哪位大哥行行好给翻译一下?
Spector Setup Procedure
My name is Jim Eppard. I work at Stuart Spector Design - the Bass Guitar company (www.spectorbass.com). A new Spector bass owner recently emailed a request for me to provide a detailed description of my set up procedure.
I came up with this rather long winded diatribe. Really - it's as brief & concise as I could make it! I think
it was Einstein who said "everything should be explained as simply as possible...BUT NO SIMPLER!"
Hopefully this will help some folks out & most of this information is applicable to guitars as well...enjoy!!
We will begin with the instrument accurately tuned to concert pitch. If you use an alternate tuning: tune the instrument to whatever is 'normal' for your application.
All measurements will be made while holding the instrument in it's playing position.
Have you ever removed a string from an instrument & had it spin around like a spring when removing it from the bridge or the tuner post? This is a string that was installed
incorrectly and the core got twisted. This is an acute problem with round core strings (DR, etc). Hex cores are somewhat more resistant to twisting but it's still possible.
A twisted string will never sound 100% right! It may show up as a 'dead' note, inconsistent intonation, a weird out of tune harmonic or 'ghost note' in some notes...It'll drive you crazy!
The best thing is to wind the string on the post and tune it up, then detune it until you can pull the ball out of the bridge and determine that the string is in a completely relaxed mode.
Its also important that the strings be stretched to the point that they do not drop in pitch when tugged aggressively (deflection of 3/4" or more) from a point near the end of the
fingerboard. Don't proceed until you are satisfied that the full tension has been achieved.
NECK RELIEF:
The amount of 'bow' (or lack of) in the neck when under tension
Check neck relief by depressing the low E string @ the 2nd & last fret . Observe the space between the bottom of the string & the top of the 9th fret, A standard weight business
card or a thin guitar pick is a good amount of relief to start with for a bass guitar. A regular guitar can do with considerably less. Adjust relief with the truss rod. Be sure to
fully insert the 4mm wrench before adjusting. Clockwise = less relief, CCW = more.
As a final check, sight down the neck from either end. If it is obviously backbowed but the relief looks okay it's possible that the frets were leveled with the nec
in a backbowed state. In this rare situation I adjust the neck to be straight by eye & proceed from there. If it's too much though, a leveling / crown / polish job is
indicated for the optimum set up. Sometimes when sighting a neck you will see more relief on the bass side than the treble side. This is okay as long as neither side
is backbowed.
Optimum relief / action settings are really determined the player's technique - if you have an aggressive picking / plucking technique you will need more
relief / higher action. A player with a very light touch can have a neck that is almost straight & buzz free action that is very low.
It's best, during the initial set up, to have the relief set a bit on the straight side because it will enable a more accurate assessment of the nut height spec later.
I use the second fret as a benchmark for this measurement because a lot of manufacturers (us included) leave the 1st fret high & grind level, crown & polish the rest.
This gives the lowest notes some extra room where the string excursion is greatest.
The truss rod in your bass is a 'dual action' type. This means it is capable of pushing the neck forward as well as pulling it back. If the adjuster nut feels
'loose' you have reached the null point. The rod may rattle if left in this position so snug it up slightly one way or the other. Chances are you will be well
beyond the null point but I mention this just in case!
I usually don't recommend using a capo, but then I do this by eye. I think the players touch is an important variable here but a Shubb type capo with
the tension adjusted to the minimum required to hold the string down should be okay.
STRING ACTION:
All action adjustments will be made @ the bridge. Action measurements will be made from the top of the 12th fret to the bottom of each open string.
Use a 2mm wrench to unlock the 2 screws located on either side of the bridge. The bridge saddles should be 'angled back' slightly; opposite of the
headstock angle. It's a good idea to get these roughed in now so that later (finer) adjustments can be made more easily.
I use a 6" steel machinist's rule graduated in 64ths to make the following measurements. I also wear an optivisor so that I can see them.YMMV.
While holding the instrument in it's playing position, adjust bridge saddle height to achieve the following clearances:
E - 5/64, A - 4.6/64, D - 4.3/64, G - 4/64
STRING HEIGHT AT NUT:
The goal here is to achieve a consistent feel across the fingerboard. depress each string @ the 1st fret They should all feel about the same. I
don't have an exact measurement for this but the open string should be as low as possible without any buzzing on the 1st fret. You will need proper
nut files to cut the slots deeper, if necessary. I use .105, .085, .065, .046. If you try to adjust this spec with a lot of forward bow in the neck
you run the risk of cutting the slots too low. This is fixable but it's a pain in the ass, so be careful!
If nut slot depth is changed you may need to re-adjust the action height.
INTONATION ADJUSTMENTS:
There are a lot of opinions on the best way to achieve an accurate intonation set up. This is how I do it & why.YMMV.
Use a high quality chromatic tuner. I use a Sabian ST-1500 that I find quite satisfactory for this purpose. I also have a couple of old Conn strobe
tuners that are very accurate, but they're not chromatic. FYI, I have done full setups using the strobes that I have checked afterward with the Sabian
and I am very satisfied with the Sabian's accuracy compared to these MUCH more expensive units.
It's very important to play the string the same way you play the instrument on the gig. It's also critical that the instrument be held in
playing position when making any of these adjustments.
I play the open string & tune it to pitch . I then compare it to the fretted note @ the 13th fret. I do it this way because the tuner gets less
'confused' trying to read the same note. If the tuner starts going crazy (which sometimes happens), I find that playing a tritone will reset it in a
couple of seconds.
If the fretted note is sharp compared to the tuned open string it means that the distance between the 12th fret & the bridge is too short and the saddle must be moved back
(away from the neck).
If the fretted note is flat compared to the tuned open string it means that the distance between the 12th fret & the bridge is too long and the saddle must be moved forward
(toward the neck).
Check the action height & re-adjust, if necessary after moving the bridge saddles.
EVALUATE PLAYABILITY:
Play the bass. If you notice you're getting some buzzing or fretting out - a little more neck relief &/or higher action may be indicated. Conversely, if
it's playing clean & clear all over you may want to lower the action slightly. These are judgments that only you - the player, can make to
optimize the set up to your personal style.
_________________
If it sounds good...IT IS GOOD! |
-

-

|
